Creating a transparent
banner
- Open Serif Photo Plus.
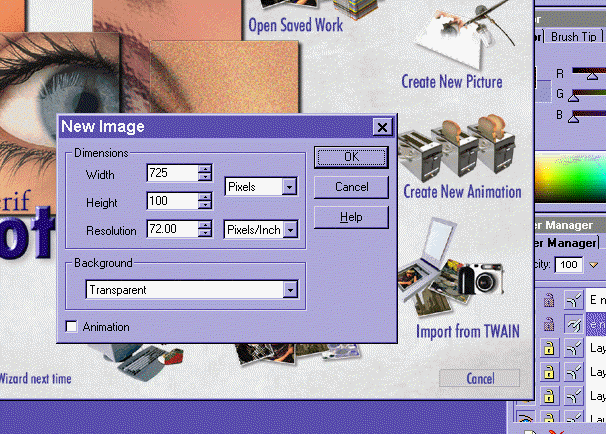
Select "Create New Picture." Specify 725 width, 100 tall, and transparent
background. Leave resolution at 72 dpi. (view image
here)
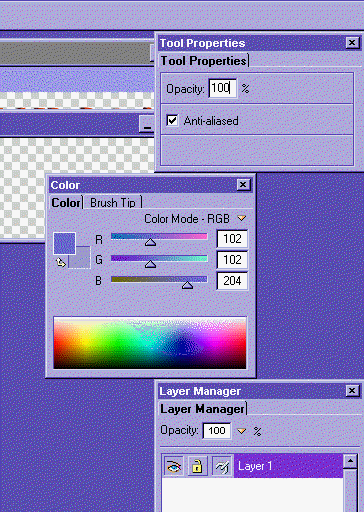
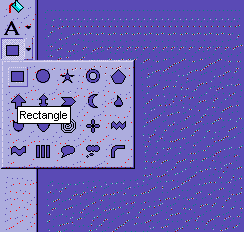
- Select the shape tool.
Then change the tool properties so your shape has 100% opacity. Change the
color so it is a "web-safe" color. (view
image here).
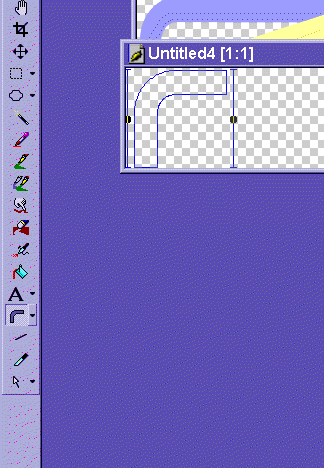
- Select the shape tool
again. Now draw the corner of your logo using the corner tool. Once it looks
the way you like it, double-click on it to apply the color from your color
palette. (view)
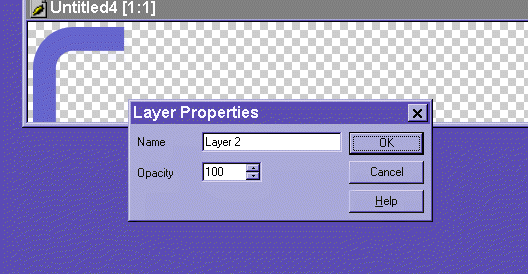
- From the "Layers"
menu, create a new layer. For now, and until you are comfortable with the
program, you should create a new layer each time you add to the graphic.(view)
- Leave the colors the
same in the color palette. Now select the rectangle tool, and use it to extend
the shape you made with the corner tool. (view)
- Create a new layer, and
change the color on the color-palette to a light, web-safe yellow. (Hint,
lighter colors=higher RGB numbers). Use the chevron shape tool to create the
yellow shape.
- Create a new layer for
the solid blue line, and use the line tool to create it. (don't forget to
change the color to a web-safe blue first).
- Use the text tool to
create the English 304 sign in red (change the color first).
- Create a new layer. Change
the color to black. Now create the exact same text in black.
- Select "arrange"
from the Layers menu, and send the black layer behind the red layer. Use the
4-way arrow, or "move tool," to align layers the way you want them.
You can use the layer tool to move between layers.
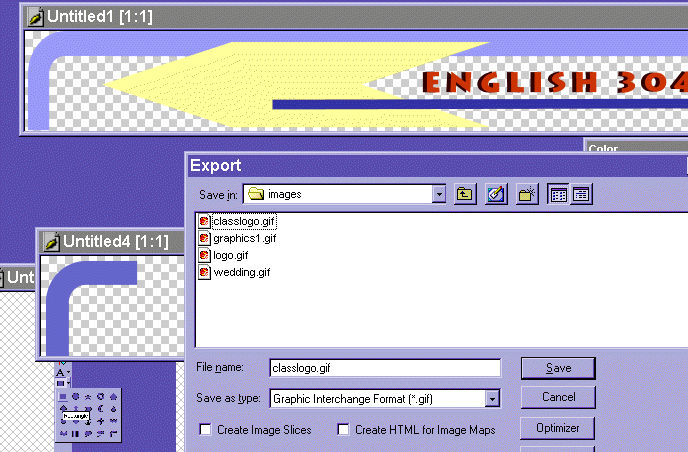
- Export the graphic as
a "gif" file. (view). If you like, use
the optimizer to make your file as small as possible.